Monday, April 18, 2016

Filter Coffee & Nostalgia

All this sunshine in Oregon is making me nostalgic and miss my hometown. The stomach feels queasy and you want to go back in time to those oh so fun days. It brings back memories of my favorite things -  mangoes, oh so soft idlis, bondas, filter coffee, walking at the towers park, evening sunsets from my terrace and reading lots of Danielle Steele novels.

Filter Cofee with podi idlis
In 2009, I  quit working as a software engineer to work for my parents business. It was one of the best decisions I had taken. I enjoyed the challenges of working with parents, and also enjoyed its benefits. One of the biggest benefits was drinking hot filter coffee. My dad would take us to New Woodlands the drive in for hot hot filter coffee and bonda :). I have two important rules when it comes to drinking good filter coffee. It should be frothy, and the color should be rich.

Living here in the US it is not easy to get the taste of the filter coffee from back home but I have experimented and tried out many coffees to finally make some thick delicious filter coffee. I buy the Narasu's filter coffee powder available at the Indian store, if in case you want to buy locally roasted coffee then make sure it is ground finely - turkish ground.

You will need a south indian filter coffee maker to make it the authentic and traditional way. There is a upper container, lower container, perforated distributor and a lid. Coffee powder goes in the upper container, using the perforated distributor press down on the coffee gently so that it is packed firmly.  Keep the perforated distributor on top and add boiling water. I usually add around 1/4 cup water to around 3-4 tbsp packed coffee powder which generally gives a nice thick decoction. This process might take anywhere from 5 - 15 mins depending on your filter and coffee powder.

I generally like to use whole milk to make coffee as it tastes more delicious and thick with it. Pour the decoction in your cup and then add the milk. If your pour your milk slowly it tends to froth and creates a creamy frothy texture. In the south we drink our coffee in a davala set .  For people like me thats the best as I can cool the coffee to drinkable temp and enjoy it !

If your day starts with great coffee, nothing else can go wrong ! :) I am off now to make my afternoon coffee :) I hope you enjoy yours. 

Tuesday, December 29, 2015

Healthy Moong Dal Dahi Vada

Moong dal dahi vada
The story of the moong dal vadas. When I was back in India last year this time, my mom made some amazingly soft vadas and made buffalo milk yoghurt. If you haven had buffalo milk, it is thick more creamier and richer than cow's milk, so obviously the yoghurt will be thick and creamy. That dahi vada was the best I have ever had. Fast forward to May , I tried making the vadas at home and they turn out hard as ever. Turns out I was using the wrong type of moong dal, the yellow split moong dal without the skin is the right one to make the vadas. This time round the vadas were super soft and tasted delicious. I hate deep frying because of the fear of hot oil, so i used an appe pan to shallow fry the vadas and they turned out great. 

Ingredients:

1 cup Moong Dal
1 cup Dahi 
4-5 pepper corns
ginger grated approx 1 tsp 

To garnish:
Roasted & Coarsely crushed jeera
Pomegranate seeds
Chopped coriander
Chili powder


Recipe:

* Soak the moong dal for 3-4 hours or preferably overnight. Drain the water and in a blender / wet grinder grind the dal till it is soft and smooth. Do not use any water. Add the pepper corns , grated ginger and salt as it is grinding. I used a wet grinder to grind the daal smoothly and get a batter which will yield fluffy vadas. It should take around 15-20 mins for the daal to grind smoothly and fluff up using a wet grinder.

* Heat the appe pan and add oil to the moulds. Drop spoonfuls of the batter into the moulds.
To help the vadas cook evenly close light with a lid. Check to see if one side is done then flip the vadas.

* Once the vadas are done soak them immediately in warm water for a few minutes. They will absorb the water and swell up.

* In the meanwhile beat the dahi with a large spoon, add salt. Squeeze out as much water as you can and add the vadas to the seasoned dahi.

* Add crushed jeera, chili powder, pomegranate seeds and chopped coriander. Chili in the fridge and serve.

Sunday, November 29, 2015

Lentil curry with Butternut Squash ( Butternut squash sambhar)

Fall, the season for soups and squash. I always used to associate butternut squash with something sweet, until I tried this sambhar at a friends place. Butternut squash is hard to chop, so if you can buy it already cut it saves you half the time. This sambhar is very easy to make does not require any fancy ingredients. I hope you enjoy it with some hot steaming rice and potatoes , dont forget to add a dollop of ghee .


Butternut squash sambhar 

Ingredients:

1/2 cup Toor daal (split pigeon peas)
Butternut squash chopped into cubes about 1 cup
2 Green chili's slit into half
1/2 Onion chopped finely
1-2 Tomatoes diced
1 small piece of tamarind
1 to 1/2 tsp chili powder
1 tsp sambhar powder
1 tsp mustard seeds
1 tsp urad dal
pinch of asafoetida (hing).
1 tsp Cooking Oil
few curry leaves

Cilantro to garnish .

Recipe:

Soak the toor dal and tamarind in separate bowls of  water for around 15-30 mins. This helps soften the dal and cook faster.

Cook the dal in a pressure cooker at medium flame for three whistles. Smash the dal once it is cool and keep it aside.

Use a heavy bottomed pan, keep it on a medium flame add oil, once the oil is warm, add urad dal and mustard seeds. The mustard seeds will splutter, then add asafoetida, curry leaves, green chilis and onions. Let the onions cook until they turn pink.

Add the tomatoes and butternut squash, stir and let it cook for 2-3 mins. Add the sambhar powder, turmeric and salt. The sambhar powder cook for 2-3 mins again before you add the tamarind water.

Let the whole mixture boil for a good 5 -8 mins. Once this is done add the smashed dal. If your sambhar looks very thick add some water and adjust for consistency. Let the sambhar come together by letting it boil for another 5-8 mins. The butternut squash should be nice and tender.

Garnish with chopped coriander and serve with hot rice and ghee :).


Butternut squash sambhar


Wednesday, November 11, 2015

A box full of happiness.

Diwali brings back memories of lighting diyas, decorating the home and fireworks. Mom used to make a lot of savories for us, as no one in my family was very fond of sweets. But being so far away from home , there is one sweet that reminds me of my childhood it is magas.


I remember my grandma always used to have a box full of magas and she would remove 1-2 pieces everyday as prasad for her pooja in the morning. I would wait for her to be done to grab those pieces. That tiny steel box filled is one of my most vivid and fondly remembered childhood memories.

My grandma makes the best magas in the world. Last year my mom was here in the US and we celebrated Diwali after a long time together. She made magas for us. I watched as she made it and this year I replicated it.

Its very simple to put together if you have all your ingredients right.


Ingredients:
1 cup ladoo besan / magas besan ( coursely ground besan)
1 cup ghee
Castor Sugar/ finely granulated sugar to your taste apporx 1 cup

Garnish
cardamom podwer
slivered almonds

Recipe:
In a heavy bottomed pan, add ghee and besan, stir together on medium heat. Keep stirring every 2-3 mins till the besan turns a golden yellow and you get a fragrant aroma. This will depend on the type of heating you are using. It took around 30-40 mins for me. Make sure to pay attention the besan can get burnt easily.

Once the besan is a golden yellow take the pan off the stove , add sugar. I added granulated sugar to the besan which gives a slight crunch to the magas. Add the cardamom powder.

Butter the sides of a pie pan or a deep dish and now pour the mix into it. Garnish with slivered almonds and leave for a few hours to cool down and set.

Magas stays good for a few months on the counter, as there is only ghee, sugar and besan in it. I hope you enjoy your Diwali and creating new memories for your family. Happy Diwali!


Wednesday, May 13, 2015

Roasted Veggies Deep Dish Pizza

I used to hate pizzas a few years ago, I had a bad pizza somewhere in India which gave me a feeling that every pizza was a hard rubbery dough with little to no veggies and yucky tasting cheese. Over the years I have tasted some good and great pizzas. Tried making some at home and this deep dish pizza is by far my most favorite. Its pretty simple to make this pizza but you will need a cast iron skillet  - 10 inch to make this one. I love my pizza loaded with veggies, so I made this one with zucchinis, red bell peppers, jalapeños, garlic, red onions and mushrooms.

Ingredients:

Pizza dough for 1 pizza.

Tomato Sauce - Store bought

Vegetable sliced - Zucchini, red pepper, red onions, mushrooms, jalapeños, garlic. (You could also use olives, sun-dried tomatoes, artichokes).

Grated mozzarella cheese

fresh mozzarella cheese

Olive oil

Salt for seasoning

Fresh basil

Oregano & Red chili flakes

Procedure:

1. Set your oven on broil setting. Place the sliced veggies on a pan, drizzle with olive oil and grill for 8-10 mins. Veggies can burn easily so watch out.

2. Season your skillet with olive oil, place the pizza dough in the centre and start working with both hands to form a base with high edges. Go from the centre towards the edge , so you have a thin crust but a higher edge.

3. Once veggies are roasted add sauce, veggies, shredded cheese and mix everything together. Add seasoning - salt, oregano, basil and chili flakes to this mixture. The jalapeños if hot may add enough spice to the dish so check before adding.

4. Pour the mixture into the deep dish you created with the pizza dough. Top with more cheese and also sliced fresh mozzarella.

5. Bake in the oven at 425 F for 15-20 mins until cheese has browned and melted.

6. Remove from the oven carefully, wear gloves on both hands as skillets can get very hot. Remove into a pizza pan or wooden chopping block and slice. Enjoy your pizza :).


Tuesday, June 10, 2014

Quick healthy lunch - Val Papadi Quinoa.


Val Papadi Quinoa 

Since becoming pregnant, lunch usually calls for something quick and easy. The less time I spend in the kitchen, more time I get in relaxing, reading and doing whatever it is that I want to do . I adapted this recipe by interchanging rice for Quinoa to make it more healthy and wholesome.

Quinoa healthy indian recipe
Val Papadi Quinoa
Serves: 2

Preparation time : 5 mins

Cooking time : approx 15-20 mins.

Ingredients:

Uncooked Quinoa - 1 1/2 cup
Onion -  1/4 cup finely chopped
Ginger garlic paste - 1/2 tsp
Green chilli paste - 1/2 tsp
Frozen or fresh val papadi - 1/2 cup
Garam masala - 1 tsp
Salt - to taste

To temper:

Ghee/Oil - 1 tbsp
Mustard - 1/4 tsp
Jeera - 1/4 tsp
Curry leaves - 3-4

Recipe:

* In a pan, add the ghee/oil. Once the ghee is heated a little add mustard, the mustard will splutter to this add jeera and curry leaves.

* Once the jeera sizzles add the chopped onions, sautee for a min or two and then add ginger garlic & green chilli paste. Cook it till the raw smell goes away.

* Add the val papadi, garam masala and let it cook for a min or two. To this add the uncooked quinoa. I generally do not sautee my quinoa, as roasting it for a few mins produces a nutty flavor which I am not very fond off.

* Add 3 cups of water to the quinoa and cook. The quinoa will turn transparent and the germ of the quinoa will be seen. At this time the water should have also evaporated, switch off the gas and place a lid on the pan. Let it rest for 5-10 mins.

* The heat from closing the pan, makes the quinoa fluffy and light. The quinoa is ready to be served. Serve with chopped cilantro.
Healthy Quinoa recipes
Val Papadi Quinoa with Kadi

Tuesday, January 21, 2014

Roasted Vegetable Lasagna

My entire family loves lasagna. Many years ago there used to be a fusion restaurant on Mount Road in Chennai which served some great lasagna. It was a very different lasagna with a bread crumb topping and loads of spinach. I like this particular recipe because it uses both white and red sauce, has a ton of veggies and is not cheesy at all. I hope you enjoy making this for your friends and family.


Recipe: Roasted Vegetable Lasagna.

The recipe is split into three parts and I have mentioned the ingredients under each. You can use store bought white sauce if you don't want the hassle of making it at home. It will also save you some time.

Serves: 4 or 2 ( with leftovers )

Preparation time: 1 hour

Baking time: 40 - 45 mins

For the filling:

1 - Zucchini sliced in half moons
1 - 1/2 cups mushrooms sliced
1 red pepper diced
1 eggplant sliced
2 -3 cloves of garlic un peeled
1 tbsp olive oil
dash of salt & peper
1 tsp Italian seasoning mix.

* Preheat oven to 375 F, Place vegetable on a baking tray sprinkle with olive oil, italian herbs, a dash of salt and pepper.

* Bake for 30-40 mins or until roasted completely.

* Remove the skins of the garlic before assembling in the lasagna. You can roast these veggies a day before you make the lasagna to save you time.


White Sauce:

2 tbsp butter
1/4 cup flour
4 cups hot milk
Salt & pepper to season
red chili flakes for spice

* Before you start the sauce, place 4 cups of milk in a pan on medium heat.

* In a heavy bottomed vessel, melt the butter and add the flour. Stir until the flour is browned a little.

* Add the milk now a little at a time and keep stirring. If the milk is hot enough the sauce will start thickening immediately. Continue until you have added all the milk. If the sauce does not thicken stir continuously on medium low heat. Sometimes the sauce takes around 30 mins to thicken.

For Assembly:

* Store bought Pizza sauce or Tomato sauce
* White sauce
* Pre-cooked lasagna noodles ( approx 10 ) **See Note
* 1 -2 cups grated parmesan cheese
* Roasted veggies

**Note: I like the lasagna noodles to be cooked before I bake them, as the un-cooked lasagna noodles get to dry and thick. Cook according to package instructions.

* In a rectangular baking dish. First spread a layer of the red sauce. Then add a spoonful of roasted veggies everything except the eggplant slices.

* On this we will then place the lasagna noodles in such a way that the entire surface of the baking dish is covered.

* Next layer with the roasted eggplant slices, and cover with white sauce generously.


* Repeat again with a layer of noodles.


* On top of the noodles, now place both a layer of white and red sauce covered with grated parmesan cheese.


* Bake at 375 for 40-45 mins until the cheese on top has melted, bubbly and browned.

Enjoy your lasagna with a side salad.


Wednesday, January 15, 2014

Easy Cucumber Carrot Stir Fry

My grand mother is a great cook. She makes any vegetable taste delicious. She has magic in her fingers. She makes this salad type stir-fry very often to go with rotis. I hope you enjoy her recipe. 


Cucumber Carrot Stir Fry 

Time: 15 mins 

Serves: 2 

Ingredients:

* 1 cucumber - peeled and sliced lengthwise
* 1 Carrot - peeled and sliced lengthwise
* 2 green chilies
* 1 tsp olive oil
* 1 tsp mustard 
* 1 tsp jeera ( cumin )
* Salt to taste.
* Dash of Lemon juice
* Cilantro - handful chopped

Recipe:

1. Place a pan on medium heat and add olive oil. Add mustard , once it starts spluttering add the jeera. 

2. Add the cucumber, carrot and green chillies. Make sure all the vegetables are coated with the olive oil. 

3. Cover the pan with a lid and cook for 5 mins or until the cucumber looks transparent. Add salt to taste. 

4. Serve hot with chopped cilantro and a dash of freshly squeezed lemon juice.


Saturday, December 21, 2013

Quinoa seasoned with mustard, spices and onions

It's my first Christmas in Portland. I have lived here for 2 1/2 years now and never been in the city during Christmas. It's surprising to see how busy all the shopping malls are. Just today we went to one near our home which is rather small and could not find any parking at all, which is quiet surprising as there is usually lots of parking in the area.

I have been at the shopping malls a lot lately, thanks to my sister who is visiting from India. So when it comes to cooking I don't have the time and patience to cook. Rice is staple food in South India, where I have lived for most part of my life. It is easy to cook and does not require a lot of effort. I have been trying to replace rice with quinoa in a variety of different dishes. My mom makes amazing vagharela quinoa, which means seasoned quinoa. And I made a similar dish just last week, here is the recipe.


Recipe: Quinoa seasoned with mustard, spices and onions

Serves: 2

Time: 20 minutes

Ingredients

1 cup Quinoa
1/2 cup onion finely chopped
3-4 cloves of garlic sliced
1 green chili slit lengthwise
1 tsp Olive oil
1 tsp black mustard seeds
1 tsp jeera
4-5 curry leaves

Spices

1 tsp chili powder
1/4 tsp turmeric powder
salt to taste.

 1. Wash the quinoa using a sieve and place in a pot with 2 cups of water on medium flame. Let it cook for 7-8 mins. Cook until the water has almost evaporated. Switch the flame off and close the pot and let it sit for 4-5 mins. This makes the Quinoa fluffy.

If you need detailed explanation on how to cook Quinoa, here are some good tips from thekitchn.com which I absolutely love.

2. To the cooled quinoa add all the spices and mix with a fork.

3. In a pan, add olive oil, mustard and jeera. Once the seasoning starts to splutter, add the green chili, curry leaves, onions and chopped garlic. Add a pinch of salt to let the onions cook faster.

4. Next add the quinoa with the spices to the cooked onions. Stir and let the quinoa cook until everything is blended perfectly. This would take 4-5 mins.

5. Garnish with chopped cilantro or spring onions and serve hot.


Wednesday, November 20, 2013

Pizza Kati rolls

Ahh, Kati rolls. Reminds me about my college days when I used to sneak away with my sister to get kati rolls from the vendor outside the big retail store. Kati rolls are said to have originated in Kolatta, where Kati kebabas were enclosed in a paratha. In India, Kati roll is a popular street food available at any mall and street corner. It usually comes with different fillings topped with cheese, marinated green chilies and spicy sauces.

Pizza Kati rolls
I made these Kati rolls using toppings from leftover pizza party at my house and its is like biting into a wrapped pizza! These wraps are easy to put together as u have the pizza sauce ready and vegetables sliced and chopped. They are perfect for a lunchbox meal at work, or an afternoon snack. You can even make a meal out of them by serving with a side of soup or salad.

The recipe is only a guide , please adjust the seasoning and ingredients to your liking.

Ingredients:

Left over pizza sauce - tomato, alfredo, pesto and sauce you might have.
Wraps - Rotis, Parathas
Left over Vegetable toppings
 - sliced mushrooms
 - sliced onions
 - green peppers
 - jalapeños
 - grated chesse
 - cubed paneer
Olive Oil
Soy Sauce
Hot sauce
Cilantro a handful - chopped finely
Chaat Masala

For the filling:

* In a pan add a tsp of olive oil and add all the vegetables and paneer. Cook on high for 3-4 mins. Add soy sauce and hot sauce and stir for another 2-3 mins.
* Switch off the stove and take the pan off the flame.

Assembly station:

* Create an assembly station by keeping a large chopping board on the table and arranging the  filling, sauce, Chopped cilantro and chaat masala around it.
* If you are using frozen parathas or rotis, it will be a good idea to cook them now and keep them ready.

* Cut a small rectangular piece of wax paper and place it on the chopping board and place the cooked roti/paratha on it.

* Spread a spoonful of the pizza sauce on the roti and spread the filling in the centre.

*Top it off with chopped cilantro , cheese and a dash of chaat masala.

* Fold 1/4 of the roti from the end toward you to the top, in such a way so to secure the filling from dropping out from below.

* Now gently fold the roti from the left and then the right. Roll the wax paper around and below the wrap.

* Repeat for remaining rotis.

This video shows another easier technique to fold the wraps, my wraps were too small for this technique.


Monday, November 18, 2013

Broken Wheat Vegetable Delight

How has your weekend been? Mine was good. We did quiet a few things, caught up with friends, went on a long hike after a long time, went shopping at IKEA and tried to watch a movie using Chromecast. Every time I go shopping at IKEA I have to buy a few more air-tight jars for my pantry. I have an obsession for jars, any size, shape and color jar and have quiet a collection in my pantry.


Broken Wheat also called Bulgar wheat, Fada, Dalia is high in fiber and is made from whole raw wheat kernels. I am not a big fan of broken wheat and enjoy it if its cooked the right way and eaten hot. This is an easy one pot meal. Broken wheat can be substituted with rice as well in this recipe.

I had a small cauliflower, one potato and one carrot lying in the pantry and were used up in this dish. The recipe is a good way to finish up leftover veggies and also eat healthy.

Recipe:

Serves: 2-3 adults

Time: 20 mins

Special Kitchenware: Pressure cooker or  Electrical Rice Cooker.

Ingredients:
1 cup broken wheat / rice
1/4 cup chopped onions
1 tsp ginger garlic paste *
2-3 green chillies
1-2 cup mixed vegetables ( potatoes, carrots, french beans, peas)
Salt to taste
1/4 tsp turmeric powder
1/4 tsp chili powder/paprika
Cilantro chopped finely to garnish.

Tempering:
1/4 tsp Mustard seeds
1/4 tsp Cumin seeds
1 tsp Olive Oil


* If you do not have ginger garlic paste. Add finely chopped garlic and grated ginger where the recipe calls for this ingredient.

    Broken wheat vegetable delight
  • Wash the broken wheat thoroughly in a bowl and keep it aside. 
  • In a thick bottomed vessel / pressure cooker add olive oil, mustard and cumin seeds. The mustard seeds will start sizzling in the hot oil. 
  • At this time add the chopped onions, Sautee for 2-3 mins with a pinch of salt. The ginger-garlic paste should be added now. Cook until the raw garlic smell goes away. 
  • Add all the vegetables along with green chillies to the pot now. Let them cook for a minute or two and then add the spices - turmeric, chili powder and salt. Stir until the spices and vegetables are blended together. 
  • Now add two and half cups of hot water to the pot or pressure cooker. If you are using an electric cooker, transfer the mixture to the electric cooker now. For a pressure cooker cook on medium flame for 2 whistles.
You can see my reflection and that of the food on the spoon
  • Garnish with chopped cilantro and serve with papad or raita. Make sure to serve this dish hot ! 

Tell me how did you like the dish and also if you have a jar obsession like I do :). 

Tuesday, November 12, 2013

Quinoa Peas Pulao

On a glommy fall evening, all you want to do is snuggle by the fireplace and read a book or watch a movie. Cooking is the last thing you want to do. This Quinoa Pulao is easy, healthy and delicious. It takes only a few minutes to cook and most of the ingredients are in your pantry already ! So lets start cooking.


Recipe:

Time : 20 mins
Preparation : 5 mins
Serves : 2

Ingredients:

Quinoa - 1cup
Water or Vegetable Broth - 2 cups
Peas - 1/4 cup
Onion - chopped finely - 1/4 cup.
Paneer - 10 pieces ( cubed) - optional
Ginger-garlic paste - 1 tsp
Green chili - 2-3 ( depending on your spice level)
Mint leaves - a handful 
Gharam masala - 1/2 tsp
Salt to taste
Oil - 1 tsp

To Temper:
Jeera - 1 tsp
Cloves - 2-3
Cinnamon - 1/2 inch piece

* In a pot or dutch oven add olive oil and all the ingredients under the 'to temper ' list.

* The jerra will turn a golden brown, add the chopped onions to it with a pinch of salt. The salt will help the onions sweat and cook faster.

* When the onions have a pink tinge on them, add ginger-garlic paste, sauté for 2-3 mins. Add the paneer now if you have it. Sauté for few more mins.

* Add the green chili, peas, gharam masala, and mint leaves and sauté for a min or so. 

* Rinse the quinoa using a kitchen strainer. Add the washed quinoa to the pot.

* For every 1 cup of quinoa you will require 2 cups of water or broth. Let the quinoa cook until you can see the germ of the quinoa around it. The quinoa should have a ring around it, it is called the germ of the quinoa.

* To make quinoa fluffy, close the lid of the vessel after you switch off the stove and let it sit for a few minutes. Fluff the quinoa gently with a fork. Serve with Fava beans raita.

Here are more tips on how to make your quinoa fluffy.


Wednesday, November 6, 2013

CousCous Salad

When I woke up this morning, I heard from my mom in India, that Tarla Dalal India's most celebrated and loved chefs passed away. It is a very sad day. Back in the day when I was a kid and my mom always likes to cook, we used to refer to her cook books and still do today. It was just yesterday that I made her pav bhaji recipe. In India, Tarla Dalal is the equivalent of Julia Child in the United States. She was a house wife who loved cooking and started cookery classes in Mumbai, before writing her first cook book and cookery show. It is inspiring and motivating to read her story.

Let's get on to the recipe now.


Cous Cous salad, just looking at the pictures makes me drool :D
I love Couscous, during grad school I made a lot of it. It is very quick to cook and tasty. I had a couscous salad at a friends place and decided to try something similar at home. The portion size for the salad are for a side. If you are eating this as the main dish, you can double everything in the recipe for a wholesome meal.

Serves : 2

Time: 10 - 15 minutes

Recipe:

1/2 cup large pearl couscous
1 1/2 cups water
1/3  cup cucumber diced
1/3 cup red pepper diced
2 tbsp roasted sunflower seeds
cilantro for garnish

For the dressing:
2 tbsp olive oil
1 tbsp lemon juice
1/4 tsp cumin powder
Salt & pepper to taste

* Pour water into a pan along with couscous, place it on flame and let it simmer for 6 minutes. Slowly bring to a boil , take it off the flame and close with lid. Let the couscous cook for 10 minutes.

* Once the couscous is cooked it will be fluffy and soft. Drain the water and let the couscous cool in a colander.

* Meanwhile add all the ingredients for the dressing in a measuring jar or bowl and stir.

* Once the couscous has cooled down, add it to the cucumber, red pepper, sunflower seeds and cilantro. Pour the dressing over the couscous and serve immediately.

* Enjoy with a cup of hot soup or by itself. You can also add chopped onions, baby tomatoes and olives , feta cheese to make it a mediterranean style salad.


Tuesday, November 5, 2013

Vegan & Gluten free - Creamy Chunky Mushroom Soup

I love mushrooms. They have an earthy flavor which is best felt in a bowl of "mushroom"y soup :). They are also in season right now, and so are fresh and cheap. The local farmers market in Portland has different types of wild mushrooms , some of them can cost up to $20/ pound ! You should check it out if you are in Portland. But for this recipe I have used the easily available crimini mushrooms. This soup is creamy and has chunks of mushrooms. The cream does not take over the earthiness of the mushrooms in this soup. So if you like mushrooms, this soup is definitely for you.

New soup bowls have a way of making us drink more soup..

I have adopted this recipe from New Season market's Cream of mushroom soup. It is easy to make this soup Vegan , and I have included substitutions for it.

Recipe:

2 cups crimini mushrooms
1 onion diced finely
1 tbsp olive oil or coconut oil
1 tbsp rice flour

2 cups water or vegetable stock
2-3 tbsp cream or coconut cream
pinch of cayenne
salt & pepper to taste
fresh cilantro for garnish.

* Clean mushrooms using a tissue paper. Keep 1/4 cup of the mushrooms aside and chop finely. Slice the rest of the mushrooms.

* In a heavy bottomed vessel add the oil and diced onions and sliced mushrooms. Cover the pan and sweat on low heat for 6-7 minutes.

* Add the rice flour and cook for 1 minute. Make sure there are no lumps.

* Slowly add the water or vegetable stock to the mixture . Then add the cream / coconut cream, cayenne, salt and pepper.

* Cook for 15 minutes. Until everything is combined and the soup looks thickened.

* Remove from flame and using an immersion blender blend the soup. Put it back on the flame again and add the finely chopped mushroom pieces and cook until done.

* Serve with chopped cilantro.

I made this with couscous salad and it was a great combination. I will put up the recipe for Couscous salad tomorrow. Let me know how the soup turned out ! Ciao.

Creamy mushroom soup with couscous salad

Monday, November 4, 2013

Thai curry Butternut Squash Soup

It's fall already ! The year has flown by so soon. I remember last December I went home to India and now its almost December again :O. Come Fall and there are different winter squashes and pumpkins available everywhere. They are hard to avoid. I haven't experimented a lot with butternut squash, but I seem to be liking it a lot lately. When its cold and rainy, there is nothing like a hot bowl of hearty home made soup.
A few weeks back I made a thai inspired butternut squash soup, which is hearty, easy to make and fills you up. I will not be surprised if you have most of the ingredients for this recipe in your pantry. This soup is dairy free and delicious.
Thai Butternut squash soup.
Ingredients:

1 small butternut squash peeled, cubed and de-seeded ( 2 cups )
2-3 cloves of Garlic cut finely
1 small onion diced
1 tbsp olive oil
1 tbsp red thai curry paste
4 cups Vegetable stock
14 oz can coconut milk
Salt & Pepper
Cilantro chopped
Roasted peanuts - for garnish

* In a heavy bottomed pot, add olive oil, onions and garlic. Add a dash of salt to help it cook. The onions will turn a light pink and start sweating.

* Add the red thai curry paste and cook for another 2 mins.

* Now add your butternut squash and vegetable stock. Close with lid and let it cook for 10-15 mins or until soft.

* Once it is soft, take it off the stove and blend either in a blender or use an immersion blender to puree it. The puree will be very thick. Add the coconut milk, salt and pepper. Adjust with water if its too thick.

* Put the pot back on the stove and let it simmer for a few minutes until everything has blended properly. Do not let the mixture boil.

Serve with chopped cilantro and peanuts. I also like adding a dash of lime for an authentic thai taste. To make it more spicy trying adding siracha or red chilli flakes to the soup as it cooks. We added a dash of siracha and it elevated the flavor of the soup .

I hope you all enjoy.


Sunday, July 21, 2013

My Grandma's Potatoes in indian spices

I have been wanting to write every week, but since I have started my marketing internship, my days have gotten very busy and hectic. This recipe is a traditional gujrati recipe and is my grandma's. My grandma is a great cook. She brings a lot of flavor into every dish with her magical hands. She taught me how to make this dish many years ago when I was in college, its been my fav and most loved dish ever since. I hope you enjoy making it.

Potatoes sabji 
Ingredients

4-5 Medium sized Potatoes
10 Broken cashews
10 Golden raisins
2-3 Curry leaves
2-3 tbsp Oil.
1 tsp Cumin seeds
5 Sprigs of Cilantro

Spices:
1/4 tsp Turmeric powder
   1 tsp Chilli powder
1/4 tsp Gharam masala
   2 tsp Coriander powder
1/4 tsp Sugar
Salt to taste.

   Boil the potatoes in a pot or in the microwave. The potatoes should be cooked completely.


    Once the potatoes are boiled, cool , peel and cut into cubes. Placed the cubed potatoes in a bowl.
    Add all the spices listed under spices to the potatoes.

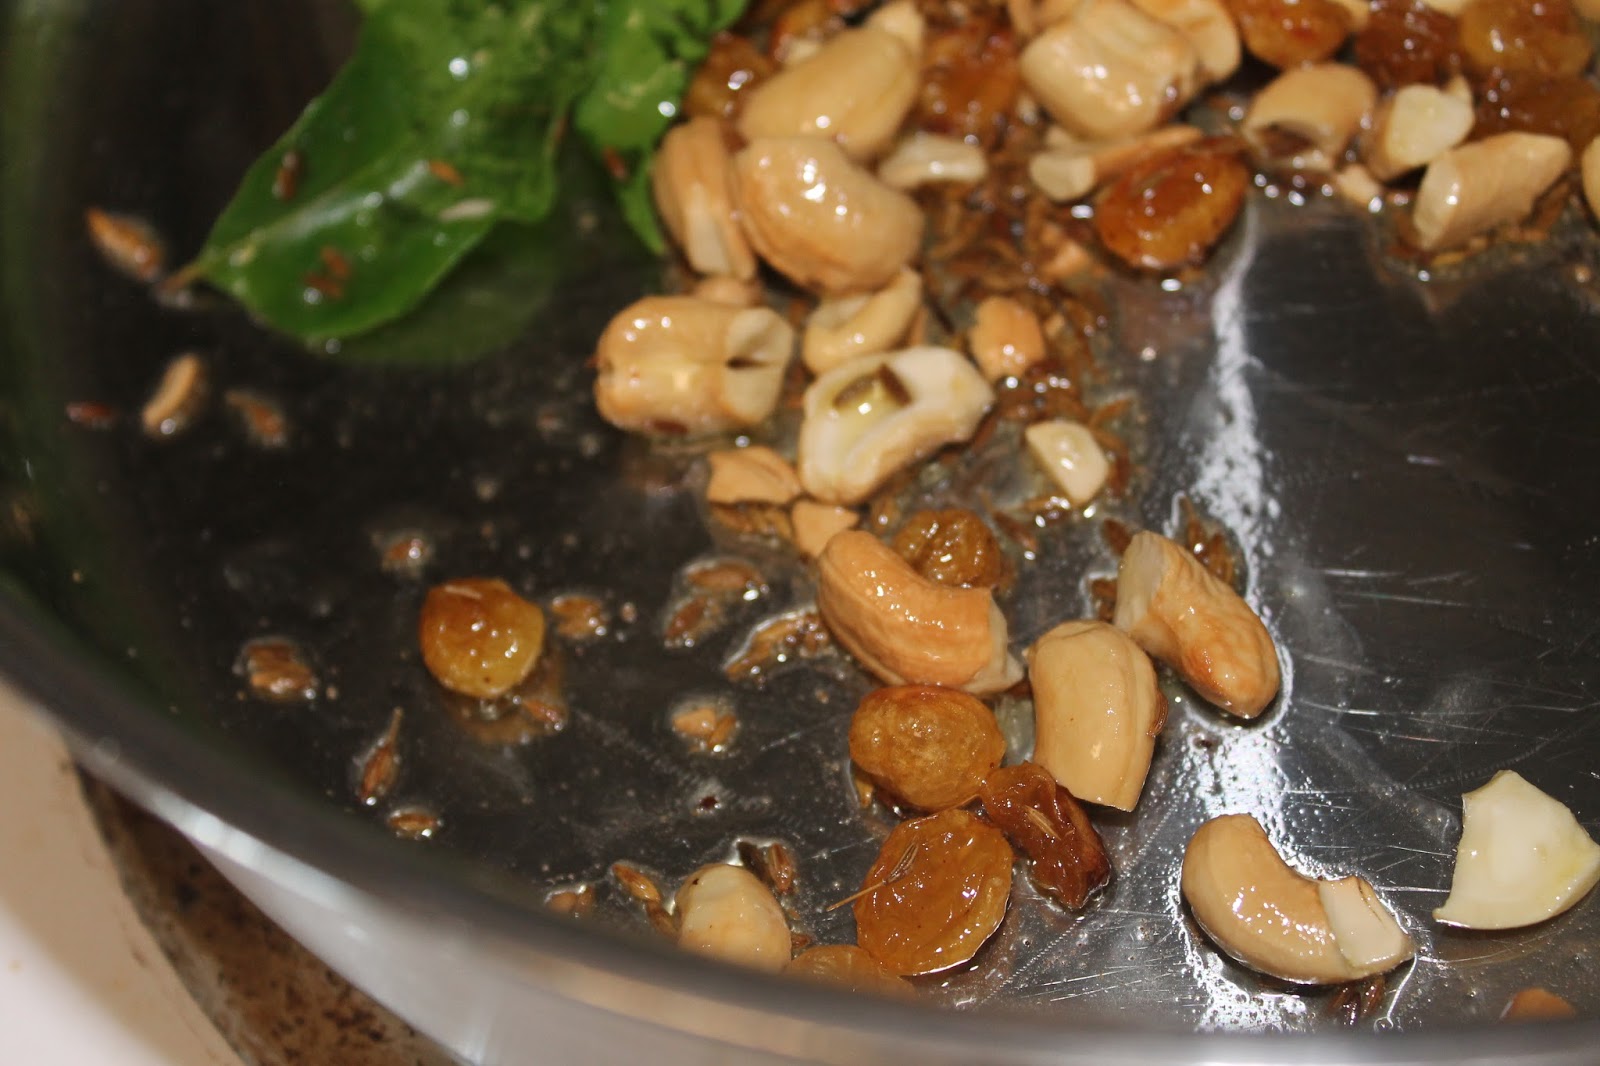
In a thick bottomed pan, add 2-3 tbsp of oil. Once the oil is hot, add the cumin seeds, in a few mins the cumin will turn golden. Add that moment, add the cashews, raisins and curry leaves. Sautee for a few minutes until the cashews are golden and the raisins have plumped up.


Now add the already spiced potatoes into the pan. Then stir and cook until the spices have blended into each other.

Garnish with chopped coriander.


Enjoy with roti !!!


Wednesday, June 12, 2013

Homemade Ice Cream with no Cream !!!

A few weeks ago, I had been binging on sugar. Sugar in chocolate syrup, cake, mochas and chocolate !  I decided to put my sugar cravings at a stop by going on a sugar free diet from Monday - Friday, so apart from sugar in my coffee, I dont add any sugar any where else. Being so hard on oneself, you want to treat yourself to a sugar free dessert during the week. Here is my recipe of a homemade ice-cream made without any special equipment, dairy free, vegan and no added sugar.

Let's not waste anytime and get to the recipe, Frozen Banana & Cherry Ice Cream. I have adapted this recipe from The Simple Veganista blog. 

Ingredients:

*2  Bananas

*1 cup frozen cherries

*Chopped Chocolate

You will need to plan ahead of time to make this for dessert. If you have bananas that have browned lying on your kitchen counter, those are just perfect for this dessert. Peel the skins of, place them on a baking sheet and freeze them.

Cherry me red ;)
For frozen cherries, you can buy them frozen straight from the grocery store or freeze them by yourself. But if you will need to pit fresh cherries before freezing them.


Cherries
Cherries !

Do not buy a special pitting machine for pitting just a few cherries as I think its just a waste of money. You can use a simple pastry tip or chop sticks to remove the pits. After you pit the cherries, freeze the cherries the same way as the bananas. 

The fruits need at least 3 - 4 hours to freeze.

Bananas and Cherries
Banans and Cherries ready to be frozen !

Once your fruits are frozen. Put them in a food processor or blender and blend, if its too hard to blend let it sit for 2-3 minutes and blend again.
Pitted cherries
The consistency should be thick and creamy just like a real ice-cream. Serve with chopped chocolate !!! You need to serve this immediately, as it is a soft serve ice-cream. And is an easy dessert to serve if you have guests.

I hope you do enjoy serving this homemade ice-cream with no cream.  

Soft serve frozen banana-cherry home made ice-cream with no cream ! 

frozen banana cherries ice-cream
My bowl of ice-cream

Wednesday, June 5, 2013

How to freeze Strawberries, handy Kitchen Tips !!!!

It is strawberry season finally, I have been waiting a whole year for it. Last year due to bad weather, the strawberry season was very short and I missed out on eating my favorite Hood Strawberries. Last week, I went berry picking with my friend and her cute 11 month old daughter . We had a great time, as we were the only 3 ppl on the strawberry field. I picked not much but about 5 lbs of strawberries. I should say I was very very thrilled. I came home not knowing what I am going to do with 5lbs of strawberries.

5lbs of Strawberries and fun :) 
Here's what I did to freeze almost half of my berries to eat later. I learnt these tips from my friend whose mother freezes them this way.

It must be common sense to many of you, but I never knew this until a few days ago and thought it would be nice to share this with all of you. Strawberries once picked can get mushy in 2 days, so you can do this either the same day or the next day after you pick them.

Strawberries in a pail
I picked every single one of these :) 
Step 1 : Put your strawberries in a colander and wash them thoroughly. Look for dirt marks on the strawberry and wash off completely.

macro shot of strawberry
I love taking macro shots of strawberries, I think they are beautiful

Step 2 : Place a kitchen towel or napkin and let your strawberries dry completely. Make sure there is not much water on the strawberries, and they are not wet. I did not remove the tops or chop them, as I wanted to keep them as is. You can take off their tops and slice them before you are ready to freeze.

Step 3: Use a cookie sheet with parchment paper on it, place strawberries individually on the sheet. They should not be sticking to each other. Freeze them for a couple of hours. This extra step will ensure you have individually frozen strawberries and not ones that are clumped and frozen to each other. It will also be easier to use them.
Step 4: Remove them from the freezer and put them in a ziplock bag and back in the freezer again.
Tada, its that easy. 

I hope you have fun strawberry picking with your family !!! :) 

Basket full of strawberries :)
My basket of happiness