Saturday, December 21, 2013

Quinoa seasoned with mustard, spices and onions

It's my first Christmas in Portland. I have lived here for 2 1/2 years now and never been in the city during Christmas. It's surprising to see how busy all the shopping malls are. Just today we went to one near our home which is rather small and could not find any parking at all, which is quiet surprising as there is usually lots of parking in the area.

I have been at the shopping malls a lot lately, thanks to my sister who is visiting from India. So when it comes to cooking I don't have the time and patience to cook. Rice is staple food in South India, where I have lived for most part of my life. It is easy to cook and does not require a lot of effort. I have been trying to replace rice with quinoa in a variety of different dishes. My mom makes amazing vagharela quinoa, which means seasoned quinoa. And I made a similar dish just last week, here is the recipe.


Recipe: Quinoa seasoned with mustard, spices and onions

Serves: 2

Time: 20 minutes

Ingredients

1 cup Quinoa
1/2 cup onion finely chopped
3-4 cloves of garlic sliced
1 green chili slit lengthwise
1 tsp Olive oil
1 tsp black mustard seeds
1 tsp jeera
4-5 curry leaves

Spices

1 tsp chili powder
1/4 tsp turmeric powder
salt to taste.

 1. Wash the quinoa using a sieve and place in a pot with 2 cups of water on medium flame. Let it cook for 7-8 mins. Cook until the water has almost evaporated. Switch the flame off and close the pot and let it sit for 4-5 mins. This makes the Quinoa fluffy.

If you need detailed explanation on how to cook Quinoa, here are some good tips from thekitchn.com which I absolutely love.

2. To the cooled quinoa add all the spices and mix with a fork.

3. In a pan, add olive oil, mustard and jeera. Once the seasoning starts to splutter, add the green chili, curry leaves, onions and chopped garlic. Add a pinch of salt to let the onions cook faster.

4. Next add the quinoa with the spices to the cooked onions. Stir and let the quinoa cook until everything is blended perfectly. This would take 4-5 mins.

5. Garnish with chopped cilantro or spring onions and serve hot.


Wednesday, November 20, 2013

Pizza Kati rolls

Ahh, Kati rolls. Reminds me about my college days when I used to sneak away with my sister to get kati rolls from the vendor outside the big retail store. Kati rolls are said to have originated in Kolatta, where Kati kebabas were enclosed in a paratha. In India, Kati roll is a popular street food available at any mall and street corner. It usually comes with different fillings topped with cheese, marinated green chilies and spicy sauces.

Pizza Kati rolls
I made these Kati rolls using toppings from leftover pizza party at my house and its is like biting into a wrapped pizza! These wraps are easy to put together as u have the pizza sauce ready and vegetables sliced and chopped. They are perfect for a lunchbox meal at work, or an afternoon snack. You can even make a meal out of them by serving with a side of soup or salad.

The recipe is only a guide , please adjust the seasoning and ingredients to your liking.

Ingredients:

Left over pizza sauce - tomato, alfredo, pesto and sauce you might have.
Wraps - Rotis, Parathas
Left over Vegetable toppings
 - sliced mushrooms
 - sliced onions
 - green peppers
 - jalapeños
 - grated chesse
 - cubed paneer
Olive Oil
Soy Sauce
Hot sauce
Cilantro a handful - chopped finely
Chaat Masala

For the filling:

* In a pan add a tsp of olive oil and add all the vegetables and paneer. Cook on high for 3-4 mins. Add soy sauce and hot sauce and stir for another 2-3 mins.
* Switch off the stove and take the pan off the flame.

Assembly station:

* Create an assembly station by keeping a large chopping board on the table and arranging the  filling, sauce, Chopped cilantro and chaat masala around it.
* If you are using frozen parathas or rotis, it will be a good idea to cook them now and keep them ready.

* Cut a small rectangular piece of wax paper and place it on the chopping board and place the cooked roti/paratha on it.

* Spread a spoonful of the pizza sauce on the roti and spread the filling in the centre.

*Top it off with chopped cilantro , cheese and a dash of chaat masala.

* Fold 1/4 of the roti from the end toward you to the top, in such a way so to secure the filling from dropping out from below.

* Now gently fold the roti from the left and then the right. Roll the wax paper around and below the wrap.

* Repeat for remaining rotis.

This video shows another easier technique to fold the wraps, my wraps were too small for this technique.


Monday, November 18, 2013

Broken Wheat Vegetable Delight

How has your weekend been? Mine was good. We did quiet a few things, caught up with friends, went on a long hike after a long time, went shopping at IKEA and tried to watch a movie using Chromecast. Every time I go shopping at IKEA I have to buy a few more air-tight jars for my pantry. I have an obsession for jars, any size, shape and color jar and have quiet a collection in my pantry.


Broken Wheat also called Bulgar wheat, Fada, Dalia is high in fiber and is made from whole raw wheat kernels. I am not a big fan of broken wheat and enjoy it if its cooked the right way and eaten hot. This is an easy one pot meal. Broken wheat can be substituted with rice as well in this recipe.

I had a small cauliflower, one potato and one carrot lying in the pantry and were used up in this dish. The recipe is a good way to finish up leftover veggies and also eat healthy.

Recipe:

Serves: 2-3 adults

Time: 20 mins

Special Kitchenware: Pressure cooker or  Electrical Rice Cooker.

Ingredients:
1 cup broken wheat / rice
1/4 cup chopped onions
1 tsp ginger garlic paste *
2-3 green chillies
1-2 cup mixed vegetables ( potatoes, carrots, french beans, peas)
Salt to taste
1/4 tsp turmeric powder
1/4 tsp chili powder/paprika
Cilantro chopped finely to garnish.

Tempering:
1/4 tsp Mustard seeds
1/4 tsp Cumin seeds
1 tsp Olive Oil


* If you do not have ginger garlic paste. Add finely chopped garlic and grated ginger where the recipe calls for this ingredient.

    Broken wheat vegetable delight
  • Wash the broken wheat thoroughly in a bowl and keep it aside. 
  • In a thick bottomed vessel / pressure cooker add olive oil, mustard and cumin seeds. The mustard seeds will start sizzling in the hot oil. 
  • At this time add the chopped onions, Sautee for 2-3 mins with a pinch of salt. The ginger-garlic paste should be added now. Cook until the raw garlic smell goes away. 
  • Add all the vegetables along with green chillies to the pot now. Let them cook for a minute or two and then add the spices - turmeric, chili powder and salt. Stir until the spices and vegetables are blended together. 
  • Now add two and half cups of hot water to the pot or pressure cooker. If you are using an electric cooker, transfer the mixture to the electric cooker now. For a pressure cooker cook on medium flame for 2 whistles.
You can see my reflection and that of the food on the spoon
  • Garnish with chopped cilantro and serve with papad or raita. Make sure to serve this dish hot ! 

Tell me how did you like the dish and also if you have a jar obsession like I do :). 

Tuesday, November 12, 2013

Quinoa Peas Pulao

On a glommy fall evening, all you want to do is snuggle by the fireplace and read a book or watch a movie. Cooking is the last thing you want to do. This Quinoa Pulao is easy, healthy and delicious. It takes only a few minutes to cook and most of the ingredients are in your pantry already ! So lets start cooking.


Recipe:

Time : 20 mins
Preparation : 5 mins
Serves : 2

Ingredients:

Quinoa - 1cup
Water or Vegetable Broth - 2 cups
Peas - 1/4 cup
Onion - chopped finely - 1/4 cup.
Paneer - 10 pieces ( cubed) - optional
Ginger-garlic paste - 1 tsp
Green chili - 2-3 ( depending on your spice level)
Mint leaves - a handful 
Gharam masala - 1/2 tsp
Salt to taste
Oil - 1 tsp

To Temper:
Jeera - 1 tsp
Cloves - 2-3
Cinnamon - 1/2 inch piece

* In a pot or dutch oven add olive oil and all the ingredients under the 'to temper ' list.

* The jerra will turn a golden brown, add the chopped onions to it with a pinch of salt. The salt will help the onions sweat and cook faster.

* When the onions have a pink tinge on them, add ginger-garlic paste, sauté for 2-3 mins. Add the paneer now if you have it. Sauté for few more mins.

* Add the green chili, peas, gharam masala, and mint leaves and sauté for a min or so. 

* Rinse the quinoa using a kitchen strainer. Add the washed quinoa to the pot.

* For every 1 cup of quinoa you will require 2 cups of water or broth. Let the quinoa cook until you can see the germ of the quinoa around it. The quinoa should have a ring around it, it is called the germ of the quinoa.

* To make quinoa fluffy, close the lid of the vessel after you switch off the stove and let it sit for a few minutes. Fluff the quinoa gently with a fork. Serve with Fava beans raita.

Here are more tips on how to make your quinoa fluffy.


Wednesday, November 6, 2013

CousCous Salad

When I woke up this morning, I heard from my mom in India, that Tarla Dalal India's most celebrated and loved chefs passed away. It is a very sad day. Back in the day when I was a kid and my mom always likes to cook, we used to refer to her cook books and still do today. It was just yesterday that I made her pav bhaji recipe. In India, Tarla Dalal is the equivalent of Julia Child in the United States. She was a house wife who loved cooking and started cookery classes in Mumbai, before writing her first cook book and cookery show. It is inspiring and motivating to read her story.

Let's get on to the recipe now.


Cous Cous salad, just looking at the pictures makes me drool :D
I love Couscous, during grad school I made a lot of it. It is very quick to cook and tasty. I had a couscous salad at a friends place and decided to try something similar at home. The portion size for the salad are for a side. If you are eating this as the main dish, you can double everything in the recipe for a wholesome meal.

Serves : 2

Time: 10 - 15 minutes

Recipe:

1/2 cup large pearl couscous
1 1/2 cups water
1/3  cup cucumber diced
1/3 cup red pepper diced
2 tbsp roasted sunflower seeds
cilantro for garnish

For the dressing:
2 tbsp olive oil
1 tbsp lemon juice
1/4 tsp cumin powder
Salt & pepper to taste

* Pour water into a pan along with couscous, place it on flame and let it simmer for 6 minutes. Slowly bring to a boil , take it off the flame and close with lid. Let the couscous cook for 10 minutes.

* Once the couscous is cooked it will be fluffy and soft. Drain the water and let the couscous cool in a colander.

* Meanwhile add all the ingredients for the dressing in a measuring jar or bowl and stir.

* Once the couscous has cooled down, add it to the cucumber, red pepper, sunflower seeds and cilantro. Pour the dressing over the couscous and serve immediately.

* Enjoy with a cup of hot soup or by itself. You can also add chopped onions, baby tomatoes and olives , feta cheese to make it a mediterranean style salad.


Tuesday, November 5, 2013

Vegan & Gluten free - Creamy Chunky Mushroom Soup

I love mushrooms. They have an earthy flavor which is best felt in a bowl of "mushroom"y soup :). They are also in season right now, and so are fresh and cheap. The local farmers market in Portland has different types of wild mushrooms , some of them can cost up to $20/ pound ! You should check it out if you are in Portland. But for this recipe I have used the easily available crimini mushrooms. This soup is creamy and has chunks of mushrooms. The cream does not take over the earthiness of the mushrooms in this soup. So if you like mushrooms, this soup is definitely for you.

New soup bowls have a way of making us drink more soup..

I have adopted this recipe from New Season market's Cream of mushroom soup. It is easy to make this soup Vegan , and I have included substitutions for it.

Recipe:

2 cups crimini mushrooms
1 onion diced finely
1 tbsp olive oil or coconut oil
1 tbsp rice flour

2 cups water or vegetable stock
2-3 tbsp cream or coconut cream
pinch of cayenne
salt & pepper to taste
fresh cilantro for garnish.

* Clean mushrooms using a tissue paper. Keep 1/4 cup of the mushrooms aside and chop finely. Slice the rest of the mushrooms.

* In a heavy bottomed vessel add the oil and diced onions and sliced mushrooms. Cover the pan and sweat on low heat for 6-7 minutes.

* Add the rice flour and cook for 1 minute. Make sure there are no lumps.

* Slowly add the water or vegetable stock to the mixture . Then add the cream / coconut cream, cayenne, salt and pepper.

* Cook for 15 minutes. Until everything is combined and the soup looks thickened.

* Remove from flame and using an immersion blender blend the soup. Put it back on the flame again and add the finely chopped mushroom pieces and cook until done.

* Serve with chopped cilantro.

I made this with couscous salad and it was a great combination. I will put up the recipe for Couscous salad tomorrow. Let me know how the soup turned out ! Ciao.

Creamy mushroom soup with couscous salad

Monday, November 4, 2013

Thai curry Butternut Squash Soup

It's fall already ! The year has flown by so soon. I remember last December I went home to India and now its almost December again :O. Come Fall and there are different winter squashes and pumpkins available everywhere. They are hard to avoid. I haven't experimented a lot with butternut squash, but I seem to be liking it a lot lately. When its cold and rainy, there is nothing like a hot bowl of hearty home made soup.
A few weeks back I made a thai inspired butternut squash soup, which is hearty, easy to make and fills you up. I will not be surprised if you have most of the ingredients for this recipe in your pantry. This soup is dairy free and delicious.
Thai Butternut squash soup.
Ingredients:

1 small butternut squash peeled, cubed and de-seeded ( 2 cups )
2-3 cloves of Garlic cut finely
1 small onion diced
1 tbsp olive oil
1 tbsp red thai curry paste
4 cups Vegetable stock
14 oz can coconut milk
Salt & Pepper
Cilantro chopped
Roasted peanuts - for garnish

* In a heavy bottomed pot, add olive oil, onions and garlic. Add a dash of salt to help it cook. The onions will turn a light pink and start sweating.

* Add the red thai curry paste and cook for another 2 mins.

* Now add your butternut squash and vegetable stock. Close with lid and let it cook for 10-15 mins or until soft.

* Once it is soft, take it off the stove and blend either in a blender or use an immersion blender to puree it. The puree will be very thick. Add the coconut milk, salt and pepper. Adjust with water if its too thick.

* Put the pot back on the stove and let it simmer for a few minutes until everything has blended properly. Do not let the mixture boil.

Serve with chopped cilantro and peanuts. I also like adding a dash of lime for an authentic thai taste. To make it more spicy trying adding siracha or red chilli flakes to the soup as it cooks. We added a dash of siracha and it elevated the flavor of the soup .

I hope you all enjoy.


Sunday, July 21, 2013

My Grandma's Potatoes in indian spices

I have been wanting to write every week, but since I have started my marketing internship, my days have gotten very busy and hectic. This recipe is a traditional gujrati recipe and is my grandma's. My grandma is a great cook. She brings a lot of flavor into every dish with her magical hands. She taught me how to make this dish many years ago when I was in college, its been my fav and most loved dish ever since. I hope you enjoy making it.

Potatoes sabji 
Ingredients

4-5 Medium sized Potatoes
10 Broken cashews
10 Golden raisins
2-3 Curry leaves
2-3 tbsp Oil.
1 tsp Cumin seeds
5 Sprigs of Cilantro

Spices:
1/4 tsp Turmeric powder
   1 tsp Chilli powder
1/4 tsp Gharam masala
   2 tsp Coriander powder
1/4 tsp Sugar
Salt to taste.

   Boil the potatoes in a pot or in the microwave. The potatoes should be cooked completely.


    Once the potatoes are boiled, cool , peel and cut into cubes. Placed the cubed potatoes in a bowl.
    Add all the spices listed under spices to the potatoes.

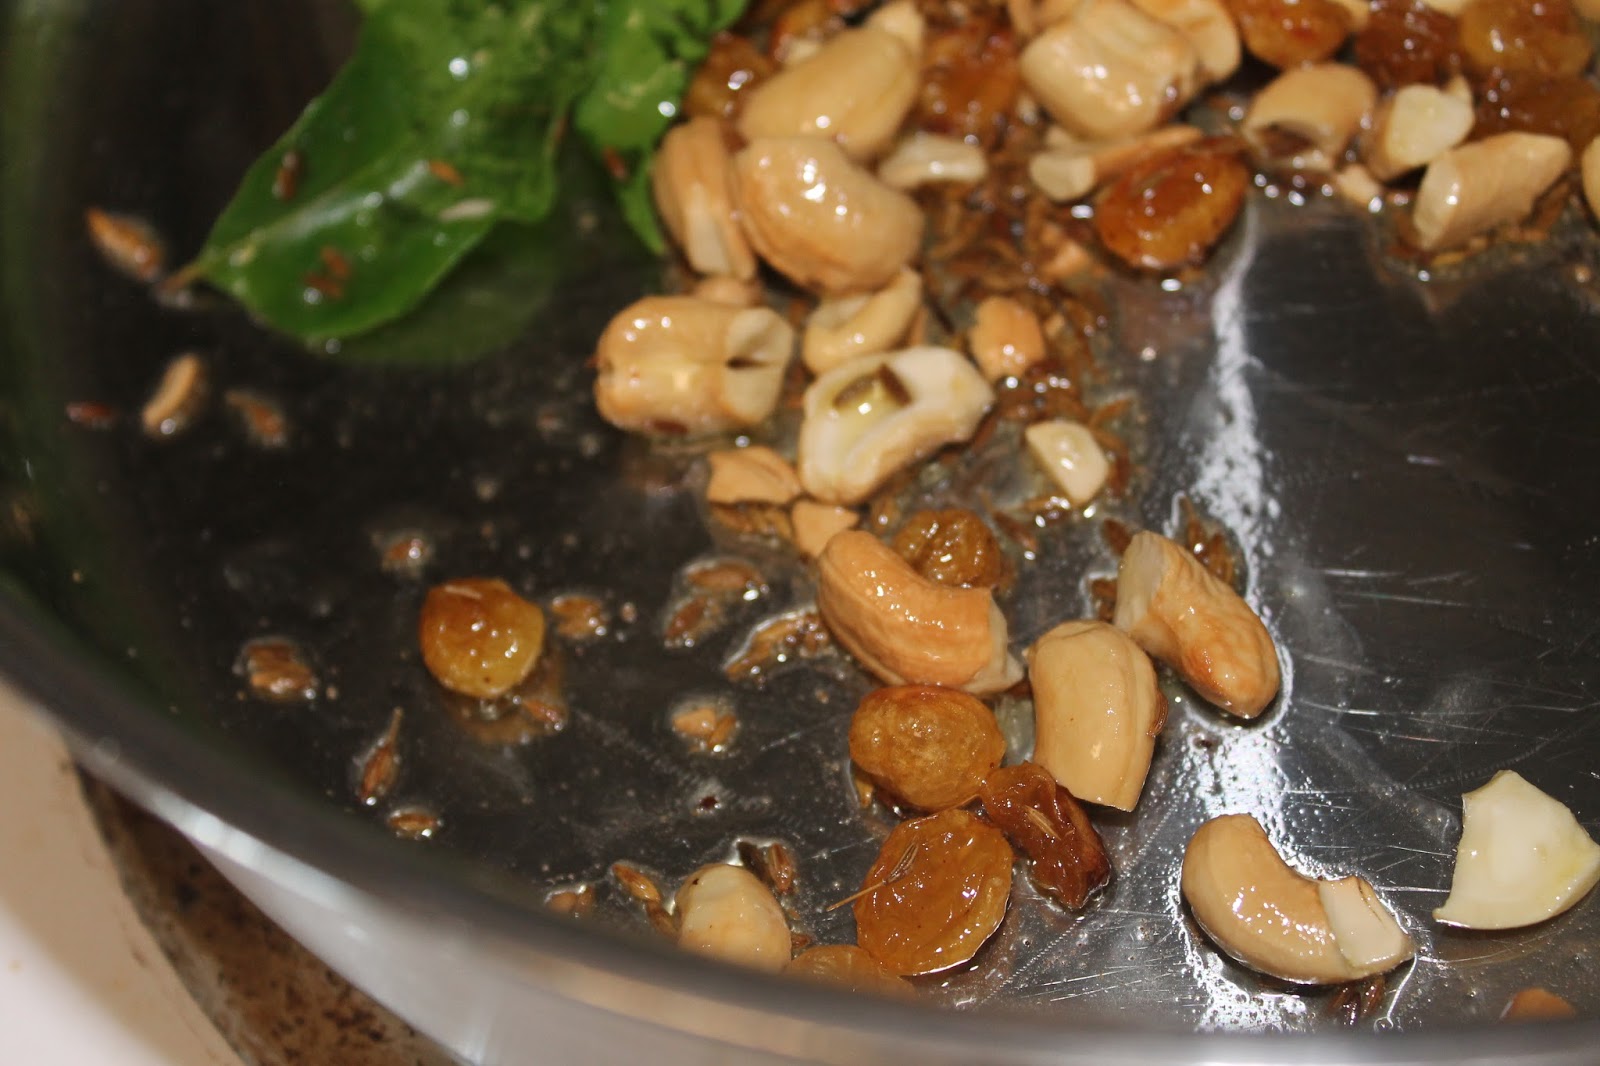
In a thick bottomed pan, add 2-3 tbsp of oil. Once the oil is hot, add the cumin seeds, in a few mins the cumin will turn golden. Add that moment, add the cashews, raisins and curry leaves. Sautee for a few minutes until the cashews are golden and the raisins have plumped up.


Now add the already spiced potatoes into the pan. Then stir and cook until the spices have blended into each other.

Garnish with chopped coriander.


Enjoy with roti !!!


Wednesday, June 12, 2013

Homemade Ice Cream with no Cream !!!

A few weeks ago, I had been binging on sugar. Sugar in chocolate syrup, cake, mochas and chocolate !  I decided to put my sugar cravings at a stop by going on a sugar free diet from Monday - Friday, so apart from sugar in my coffee, I dont add any sugar any where else. Being so hard on oneself, you want to treat yourself to a sugar free dessert during the week. Here is my recipe of a homemade ice-cream made without any special equipment, dairy free, vegan and no added sugar.

Let's not waste anytime and get to the recipe, Frozen Banana & Cherry Ice Cream. I have adapted this recipe from The Simple Veganista blog. 

Ingredients:

*2  Bananas

*1 cup frozen cherries

*Chopped Chocolate

You will need to plan ahead of time to make this for dessert. If you have bananas that have browned lying on your kitchen counter, those are just perfect for this dessert. Peel the skins of, place them on a baking sheet and freeze them.

Cherry me red ;)
For frozen cherries, you can buy them frozen straight from the grocery store or freeze them by yourself. But if you will need to pit fresh cherries before freezing them.


Cherries
Cherries !

Do not buy a special pitting machine for pitting just a few cherries as I think its just a waste of money. You can use a simple pastry tip or chop sticks to remove the pits. After you pit the cherries, freeze the cherries the same way as the bananas. 

The fruits need at least 3 - 4 hours to freeze.

Bananas and Cherries
Banans and Cherries ready to be frozen !

Once your fruits are frozen. Put them in a food processor or blender and blend, if its too hard to blend let it sit for 2-3 minutes and blend again.
Pitted cherries
The consistency should be thick and creamy just like a real ice-cream. Serve with chopped chocolate !!! You need to serve this immediately, as it is a soft serve ice-cream. And is an easy dessert to serve if you have guests.

I hope you do enjoy serving this homemade ice-cream with no cream.  

Soft serve frozen banana-cherry home made ice-cream with no cream ! 

frozen banana cherries ice-cream
My bowl of ice-cream

Wednesday, June 5, 2013

How to freeze Strawberries, handy Kitchen Tips !!!!

It is strawberry season finally, I have been waiting a whole year for it. Last year due to bad weather, the strawberry season was very short and I missed out on eating my favorite Hood Strawberries. Last week, I went berry picking with my friend and her cute 11 month old daughter . We had a great time, as we were the only 3 ppl on the strawberry field. I picked not much but about 5 lbs of strawberries. I should say I was very very thrilled. I came home not knowing what I am going to do with 5lbs of strawberries.

5lbs of Strawberries and fun :) 
Here's what I did to freeze almost half of my berries to eat later. I learnt these tips from my friend whose mother freezes them this way.

It must be common sense to many of you, but I never knew this until a few days ago and thought it would be nice to share this with all of you. Strawberries once picked can get mushy in 2 days, so you can do this either the same day or the next day after you pick them.

Strawberries in a pail
I picked every single one of these :) 
Step 1 : Put your strawberries in a colander and wash them thoroughly. Look for dirt marks on the strawberry and wash off completely.

macro shot of strawberry
I love taking macro shots of strawberries, I think they are beautiful

Step 2 : Place a kitchen towel or napkin and let your strawberries dry completely. Make sure there is not much water on the strawberries, and they are not wet. I did not remove the tops or chop them, as I wanted to keep them as is. You can take off their tops and slice them before you are ready to freeze.

Step 3: Use a cookie sheet with parchment paper on it, place strawberries individually on the sheet. They should not be sticking to each other. Freeze them for a couple of hours. This extra step will ensure you have individually frozen strawberries and not ones that are clumped and frozen to each other. It will also be easier to use them.

Step 4: Remove them from the freezer and put them in a ziplock bag and back in the freezer again.
Tada, its that easy. 

I hope you have fun strawberry picking with your family !!! :) 

Basket full of strawberries :)
My basket of happiness


Friday, May 24, 2013

Road trip stop 1 - The Dalles, Oregon

We have stopped for lunch at this cute little cafe in Dalles Oregon . Brama caffe - serves Italian and Greek food. We ordered two panini's one with chipotle chicken and the other with Caprese . 
Each table has these cute expresso shot glasses and are really cute . 

My chicken panini with Greek salad was very good. The brown bread with seeds and oats added the perfect crunch to the chicken that was grilled and soft. It also had some chipotle mayo that tasted delicious . For dessert I had the affogato vanilla gelato with expresso shots!! Oh it was so delicious I had tasted this when I was in Australia as a student . Here's a picture of it 

Will write more later.. Tata

Roadtrip Cookies or just-to-eat peanut butter chocolate chip cookies

Whenever we had to leave for a road trip or rather any trip in India, my mom always always used to make her methi theplas. So that we have something to munch on along the way. These theplas were so good that on days when we go bored of eating outside we would eat a couple of the theplas with some tea or coffee.

Well, my theplas dont exactly taste like my mom's and they require so much effort which I am very lazy to do by myself. I decided to go ahead and make some peanut butter chocolate chip flourless cookies before we leave on our road trip to Eastern Oregon ( soo excited !!! :D ) . These cookies have no flour in them, can be made gluten free using gluten free rolled oats and are a perfect snack for the road as they have protein - peanut butter, fiber - rolled oats and are tasty - chocolate chips & vanilla ! These are so easy u must, must make them :) .

peanut butter cookies
Ohh, I love these cookies !!! 

I have adapted this recipe from the blog two peas and their pod.

Ingredients:

* Rolled oats - 2/3 cup

* Peanut butter  - 1 cup

* Brown Sugar - 2/3 cup

* Eggs - 2

* Baking Soda - 1 tsp

* Vanilla Essence - 1- 1 1/2 tsp

Recipe:
Cookies
Peanut butter chocolate chip cookies


This recipe will make around 12-15 medium sized cookies.

Preheat your oven to 350 F.

In a bowl mix the rolled oats and baking soda and keep aside.

In a mixing bowl add the brown sugar, eggs, peanut butter and vanilla essence and mix until everything comes together.

Add your rolled oats + baking soda mixture and mix on medium speed for 1 min.

Finally add the chocolate chips.

The mixture is quiet sticky, so you might want to use a scoop or a spoon to put them on a sheet.

cookies

Bake them for around 9 - 10 mins until they are a little brown on the edges, once you remove them from the oven they will continue to cook. Once they cool down a bit say 2 - 3 mins you can transfer them to a cooling rack and let them cool completely before you pack them for your trip !!

I hope you all have a stress-free and relaxing weekend !! Enjoy :)

Wednesday, May 22, 2013

Time saving no-cook over night refrigerator Oatmeal

I have a confession to make. I used to hate oatmeal, It was the most un-appetizing breakfast. I have tried many times as a student to cook oats with buttermilk, milk, water, even olives ! Alas, but to no vail. I used to hate it.

Then a few months back my mom made me try masala oats, a ready to cook savory oats porridge available in India and I was hooked. I ate it so much, that I got around 30 sachets of masala oats from India.

Over night oatmeal
Rolled oats
This got me thinking that if I love savory oats in ready to eat packs so much, I should try cooking them myself with different flavors and so began my oatmeal experiments. And lo behold now I want to get up every morning to a bowl of oatmeal :) I love them so much. My favorite is the no-cook refrigerator oatmeal. It is so easy to make, requires some planning and you can have it  in any flavor you like. I love these oats as you dont have to wake every morning wondering what to eat for breakfast, saving you a lot of time and effort. I am sure you will love these.

Here's what you ll need :

* Rolled Oats - 1/3 cup + extra
* Milk/ Soy milk / Rice Milk/ Almond Milk
* Chia seeds - 1 tsp
* Cacao/ coco powder - 1 tsp
* Vanilla Essence - 1 tsp
* Sweetener - brown sugar, stevia, maple syrup, agave, honey
* Nuts
* Fruit - banana, strawberries, berries
* Air tight container that does not drip or leak.

Over night no-cook oatmealHere's how you do it. Take any kind of air tight container that you might have - mason jars or small glass lunch boxes. Put everything, except the fruit inside the container, add as much or as little milk as you like. Close it - shake shake shake, Put it in the refrigerator and forget about it. Your no-cook overnight refrigerator oatmeal is ready to eat the next day !

Before you eat it, chop some fresh fruit up and it to the oat meal. Fresh fruit enhances the chewy gooey flavor of the soaked rolled oats.

Chia seeds, have a neutral flavor and when they soak in the milk tend to swell up and become like tapioca balls. I always add some to my oatmeal.
Chia seeds in no-cook over night oatmeal
Chia seeds, a great addition the oatmeal.

And here's the trick, you can experiment with any or all of the above and even add your own flavors - Matcha Green tea, Brown sugar and Maple, and my favorite Chocolate & Strawberry. Enjoy :)
Strawberries taste so good with oatmeal
Strawberries


Strawberries with oatmeal
Strawberries, taste so good with oatmeal !
Let me know if you do try the oatmeal or how do you make your oatmeal every morning?

Wednesday, May 15, 2013

Grilled Eggplant Tacos !!!

There has been so much happening last week that I couldn write. I have been baking a lot. I took part in the food bloggers bake sale in Portland, Oregon. I baked Rose-water Raspberry cupcakes and Coconut Haystack cupcakes. I had a lot of fun meeting new people and taking part in my first bake sale.

Though its still May, weather in Oregon has been great for the past couple of days. Weather in the 70's and 80's is simply a treat ! All I can think of when it gets closer to summer is BBQ, inviting friends over and cold drinks. Most times at the BBQ, I mostly see meat or burgers. There is not much veggie and fresh food. I like the idea of making tacos with grilled eggplants. I haven tried these on my grill yet           (made them on the stove) , but I do think these would turn out great. You should give them a try. 

Summer Grilling Ideas
Perfect Tacos for Summer 
So for the hot sunny days, when you don't want to cook and just take it easy, here is a simple recipe  - "Eggplant Tacos" with just 4 ingredients - eggplants, Brie cheese, hot sauce and cilantro. They take about 10 minutes to make and less than 10 to devour :). So enjoy these tacos with some cool lemonade.

Wash and slice eggplant into slices of medium thickness. Place on a dish, sprinkle with salt and keep aside for 20 - 30 mins. The salt will make the eggplants sweat releasing some of the water content. Squeeze the water out from the eggplant by keeping it between the palms of your hands and then placing on a kitchen tissue. In a large grilling pan/ pan , add a tbsp of olive oil and grill eggplant on both sides until browned. You can also do this in the oven at 400 F for 8 mins on each side. 

Grilled eggplant Taco
Egg plant Tacos

Once done remove the eggplants and let them cool. Meanwhile slice your cheese into cubes . Once the eggplants have cooled down add a slice of cheese, a dash of hot sauce and a few chopped sprigs of cilantro.

Tacos made with grilled eggplants
Tacos perfect for a light summer snack.


I love the idea of eating veggies this way, How do you eat your veggies on the grill? Do you make tacos with other veggies. Please post your thoughts in the comment section, I would love to hear what you think.


Wednesday, May 1, 2013

Left over rice flatbread - Rice Theplas

When the sun is out in Oregon and the temp is in the mid 70's , I absolutely can't cook ! I just want to sit outside, read a book and have fun. That's the time I want to look for something quick & easy to cook. Left over rice theplas is a dish my mom used to make with left over rice or khichdi. Its a good way to use up left overs and also savor something delicious.

It was so delicious I had to take a bite :) 
Rice Theplas

Makes around 10 to 12 theplas.

Ingredients:

Left over rice - 1/2 to 1 cup

Wheat flour - 1 cup ( use 1/4 cup at a time).

Chopped onions - 1/4 cup

Turmeric  - 1/4 tspn

Chilli powder/Cayenne pepper  - 1/4 tspn

Ginger diced - a small piece

Garlic diced - a small piece.

Coriander - washed and chopped finely

Oil - 1 tbsp.

Salt to taste

In your food processor bowl, add all the ingredients with 1/4 cup of wheat flour and pulse, then add another 1/4 cup and pulse again, do the same until all ingredients are combined. You dont need to add any water.

If you dont have a food processor just add everything to a mixing bowl and mix again with 1/4 cup of wheat flour. Keep doing this until u have a dough ball which is moist and sticky.

Put one tbsp of oil over the dough, let all the sides be covered with oil. Place it in your bowl and close it and keep aside for 10 - 15 mins.

On your stove, place your pan and heat on medium heat. Make a small lemon shaped ball of the dough and roll out until it is of medium thickness. If you have holes in your thepla because of the onions its perfectly all right.
Theplas made with leftover rice
Ready to be cooked, can u see the small grains of rice?

Cooking on the pan
Place on hot pan, after bubbles form on one side, add a tsp of oil on top and flip the thepla. Using your spatula or a ball of tissue paper, press the thepla firmly on all sides. Make sure both sides are cooked thoroughly and do not have transparent surfaces. Use a more oil if needed.

Theplas made with left over rice

Place them on a kitchen tissue and serve with chundoo, pickles or just plain yoghurt !

Thursday, April 25, 2013

Spinach & Mushroom Savory Pie and my first Giveaway

Savory Pies have never been my kind of food. The word "pie" is still a bit foreign to me. Having lived most of my life in India, I haven grown up on pies. So I am still at this phase where I am exploring pies and learning to like them.

IMG_3887


I should tell you how this recipe originated it, I wanted to make a Nettle-Mushroom pie. I had a huge bag of nettles from the farmer's market. I have never cooked Nettles before but I did want to try. As per the instructions I soaked them in boiling water for 2 mins and then tried to take off the larger stems and I got pricked by the thorny stem right in the middle of my palm ! ! !. Annoying, so well experiment Nettles failed and I replaced nettles with spinach tada.. :).

This recipe is easy, but it requires some time if your making everything on the same day. You can use either a store bought pie crust or just make one readily. I chose to make my pie crust.

To make it easier for you to make the dish, I am going to not give exact measurements, because thats the way I usually cook unless I am baking a cake or cookies which needs specific measurements. This will also allow you to enjoy cooking without focusing too much on measurements.
IMG_3852

Ingredient List : Frozen Spinach, Mushrooms (any type) sliced, shallots sliced, few cloves of garlic sliced, thyme, chilli flakes salt, pepper, cottage cheese, grated parmesan cheese, Lemon zest, one egg

- Preheat the oven to 375.

- If you are using frozen pie crust it will be a great time to keep it out.

- I wasted a lot of time trying to wash nettles and cook them. With frozen spinach you will just need to thaw it by microwaving it and draining it. Place the frozen spinach in a microwave bowl and microwave for 3-5 mins.

- Meanwhile in a pan, add some olive oil, once its hot add the sliced shallots and garlic cloves, Sautee until they are caramelized or a golden brown in colour. Add a pinch of salt to help the process, after its done add the herbs and keep aside.

- In a food processor or mixing bowl, add your cottage cheese,  lemon zest, salt, pepper, chilli flakes, egg and parmesan cheese, pulse till it all comes together. Lemon zest adds a freshness to the pie and breaks the heaviness of the cheese, if you dont like the lemony flavor you can omit adding lemon zest.

- Now add the caramelized onions and garlic, along with the spinach to the mix from the food processor and keep aside.

- This is my most favorite part, putting everything together. I cut out a circle a little bit bigger than my pie pan and then placed it inside my pan, making small dents around the circumference of the pan. Then slowly add the filling inside the pan. Top it off with the pine nuts and parmesan cheese.

- Bake in the oven for 45 minutes to 1 hour. I baked mine exactly for 45 mins as I was too hungry ..

IMG_3880

ENJOY !!!!...

I am giving away two " A Place at the table books" and two pins from Participant Media. The book talks about the Hunger problem in America and how its is affecting children and possible suggestions and ideas on what we can do about it. Here is your chance to get a copy of this book.

IMG_3890

To enter this giveaway leave a comment and fill the entry form below. Contest closes on May 1st , Wednesday at 6 pm Pacific Time. The Give away is open to readers in the US only.